


In today's fast-paced world, where convenience often trumps health, it's easy to overlook the incredible benefits of homemade fermented foods. One such hidden gem is kefir - a probiotic-rich, tangy, and refreshing dairy or non-dairy beverage that can be easily made right in your own kitchen. Unlock the power of this ancient elixir and embark on a journey towards better gut health, improved digestion, and a stronger immune system.
The Wonders of Kefir
Kefir is a fermented milk or water-based drink that originated centuries ago in the Caucasus Mountains. It's created by introducing kefir grains, a unique symbiotic culture of bacteria and yeast, to milk or water. As the kefir grains ferment the liquid, they produce a host of beneficial probiotics, enzymes, and nutrients that offer a myriad of health benefits.
Consuming kefir on a regular basis can:
- Improve gut health and digestion by replenishing the gut microbiome with beneficial bacteria
- Boost the immune system and reduce inflammation
- Aid in the absorption of essential vitamins and minerals
- Promote healthy skin, hair, and nails
- Support weight management and metabolic function
The best part? Kefir is incredibly easy to make at home, allowing you to customize the flavor and control the quality of the ingredients.
Gathering Your Kefir Supplies
Before you embark on your kefir-making journey, you'll need to gather a few essential supplies:
- Kefir grains: These are the live cultures that will ferment your liquid and transform it into kefir. You can purchase kefir grains online or from a local health food store.
- A glass jar or container: Choose a non-reactive container, such as a mason jar or a specialized kefir jar, to house your kefir during the fermentation process.
- A plastic or wooden spoon: Avoid using metal utensils, as they can react with the kefir and alter the flavor.
- A strainer or cheesecloth: You'll need this to separate the kefir grains from the finished kefir.
- Milk or water: Depending on your preference, you can use cow, goat, or plant-based milk, or even water, to make your kefir.
With your supplies in hand, you're ready to begin the kefir-making process.
Step-by-Step Guide to Making Homemade Kefir
-
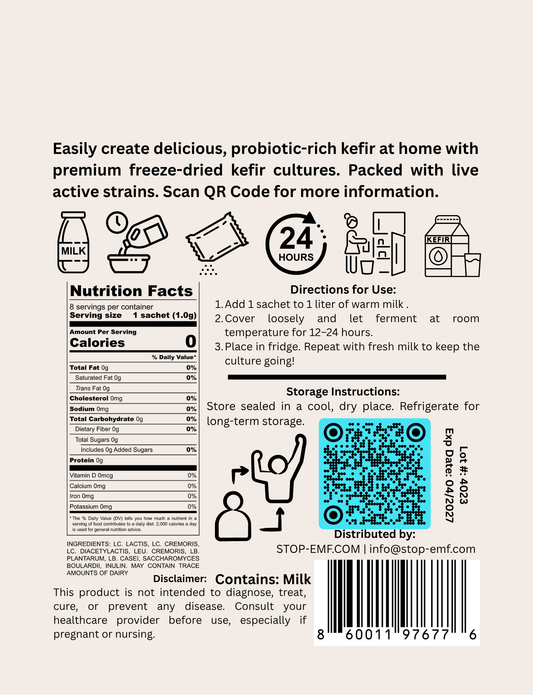
Activate the Kefir Grains: If your kefir grains are new or have been stored, you'll need to activate them before use. Place the grains in a clean jar and cover them with fresh milk or water. Allow the grains to ferment for 24-48 hours at room temperature, stirring occasionally.
-
Prepare the Kefir Liquid: Once the grains are active, you're ready to begin the kefir-making process. In a clean jar, combine the kefir grains with the desired amount of milk or water. The ratio of grains to liquid can vary, but a good starting point is 1-2 tablespoons of grains per 1 cup of liquid.
-
Ferment the Kefir: Cover the jar with a coffee filter, cheesecloth, or a breathable lid, and allow the kefir to ferment at room temperature for 12-48 hours, depending on your desired thickness and tanginess. The longer the fermentation, the more sour the kefir will become.
-
Strain the Kefir: Once the kefir has reached your desired consistency, use a plastic or wooden spoon to gently stir the contents of the jar. Then, place a strainer over a clean container and pour the kefir through, separating the grains from the liquid.
-
Save the Kefir Grains: Rinse the kefir grains under cool water and place them in a clean jar. Cover them with fresh milk or water and set them aside for your next batch of kefir.
-
Enjoy Your Homemade Kefir: The strained kefir is now ready to be enjoyed! You can drink it as is, or you can experiment with different flavors by adding fresh or frozen fruit, honey, vanilla, or other desired ingredients.
Kefir Maintenance and Troubleshooting
Maintaining your kefir grains is essential for ensuring a consistent and successful kefir-making process. Here are a few tips to keep your grains healthy and happy:
- Store the grains in the refrigerator when not in use, and feed them with fresh milk or water every 7-10 days.
- If your grains become discolored or develop an off-smell, it may be time to replace them with new grains.
- Adjust the fermentation time and temperature based on your personal taste preferences and the climate in your home.
- If your kefir is not thickening as expected, try increasing the fermentation time or the ratio of grains to liquid.
With a little practice and experimentation, you'll soon become a kefir-making pro, unlocking the incredible health benefits of this probiotic powerhouse.
So, what are you waiting for? Dive into the world of homemade kefir and experience the transformative power of this ancient elixir. Your gut, and your taste buds, will thank you!